
The DIY wolf cut is a hairstyle that’s been trending in 2021 just like the curtain bangs hairstyle did earlier this year.
This DIY wolf cut has been trending all over TikTok especially among the younger generation.
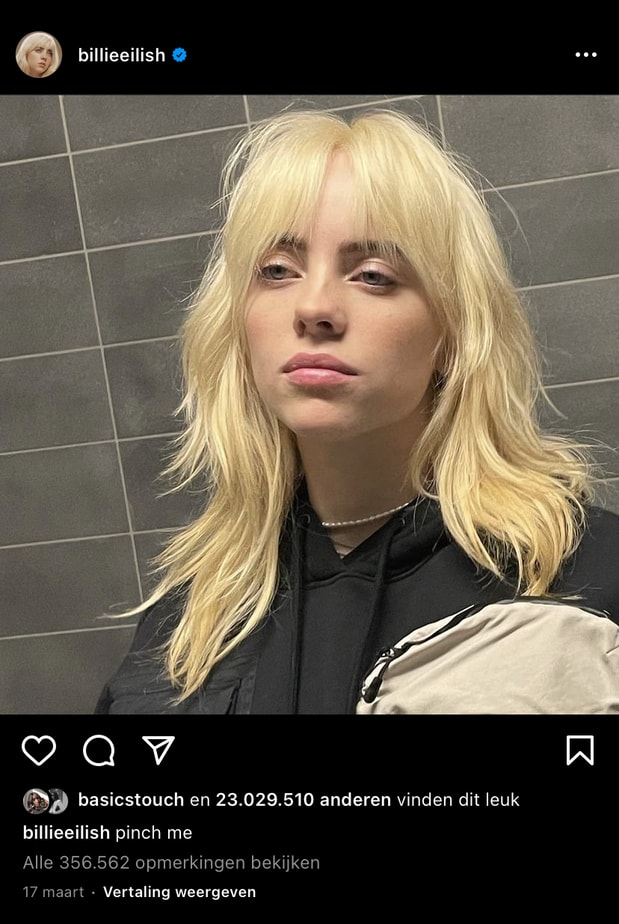
Several celebrities like Miley Cyrus and Billie Eilish were seen with this hairstyle.

Why is the DIY wolf cut trending?
The DIY wolf cut is trending because of the lock down. People weren’t able to get their done professionally at the hair dresser. A second reason for this trending hairstyle are these TikTok videos.
These videos make it seem too easy to cut your own hair into a wolf cut at home. And funny enough it is. Everyone can do it!
Now, the ease of cutting your own hair into a wolf cut triggered me to get a wolf cut too.
Yes, I had to test these DIY methods out to see if I could cut my hair into a wolf cut.
What is a wolf cut?
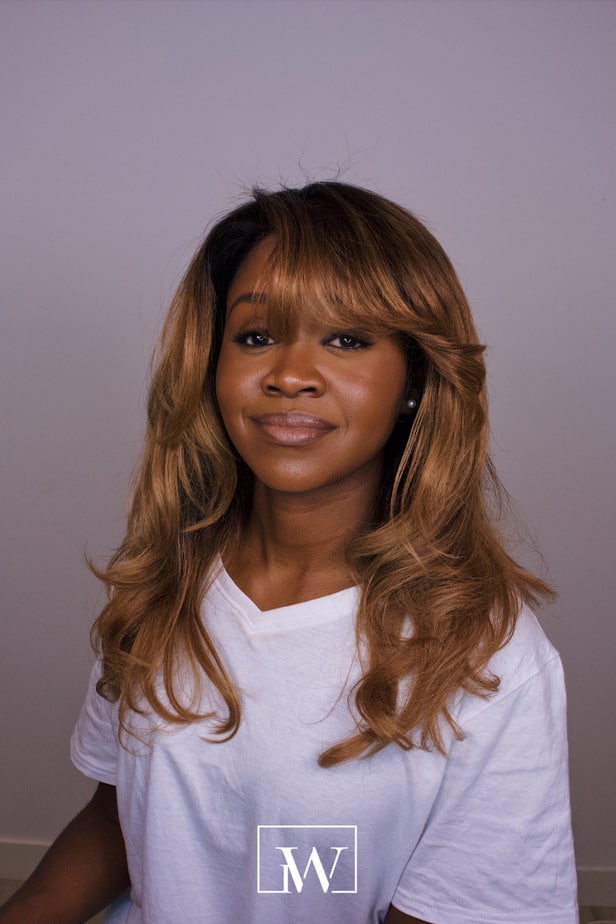
A wolf cut is a hairstyle with a lot of layered volume at the top with gradually thinner and less volume at the end. The wolf cut is a combination of a shag and a mullet.
It’s an edgy look that can be done on almost every hair type.

I noticed that there are some tricks and methods to easily achieve the wolf cut at home. I’ve used a method that I saw in a YouTube video from Paul Watts.
Note ! These are non-professional methods
Got an old wig? Use it!
My wolf cut was done on an old frontal wig that I had laying around for almost two years. I haven’t touched this wig since I tried to color the hair on this wig blonde. I bleached the hair at least three times before I noticed that the hair wouldn’t get any lighter than a color 27.

The quality of the hair on this wig was low. The hair was non-Remy human hair which means the cuticles of the hair strands are not aligned. These types of hair bundles are usually mixed with different human hair and hair fibers that mimic human hair. I wouldn’t get too deep in explaining this right now. It’s a subject for another blog post.
What I was trying to explain is that the hair got crusty and dry from me bleaching it three times and it also started to break. The hair looked unhealthy, it tangled and matted even more on the dry split ends. I didn’t like that and I started not to wear the hair anymore because it looked cheap.
Tip: Don’t throw away your old wigs
They are suitable to practice and try new styles on. Try this DIY wolf cut hack that I’m about to share on your old wig, just like I did. It might bring your old and dead wig back to life.
Don’t worry if it doesn’t! You were going to throw that wig away anyways. You will at least learn what NOT to do next time.
Order the (similar) products that i’ve used below


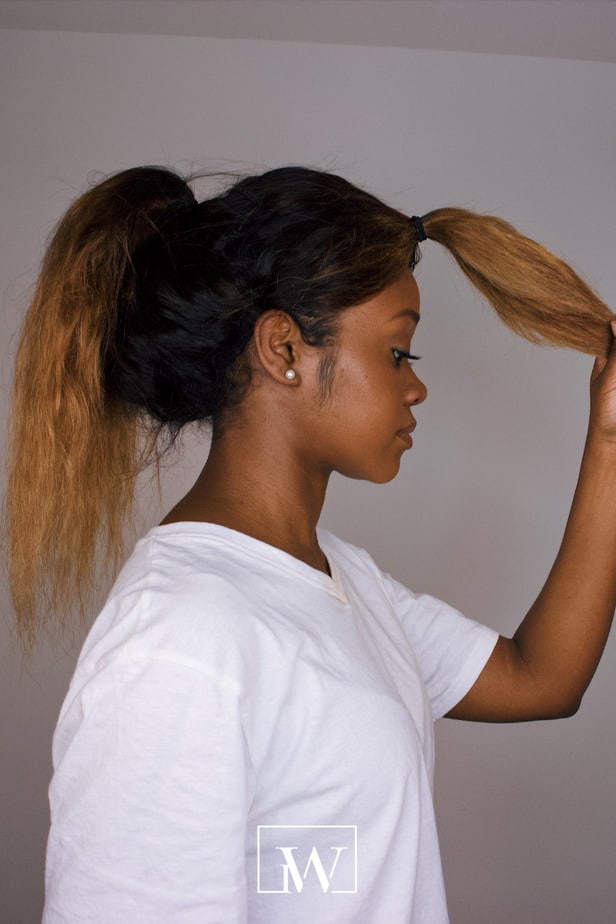
DIY wolf cut on a wig
I washed my wig and let it air dry for a couple of days. I’m using an old frontal wig from a couple of years ago.
- Then I installed and detangled that hair.
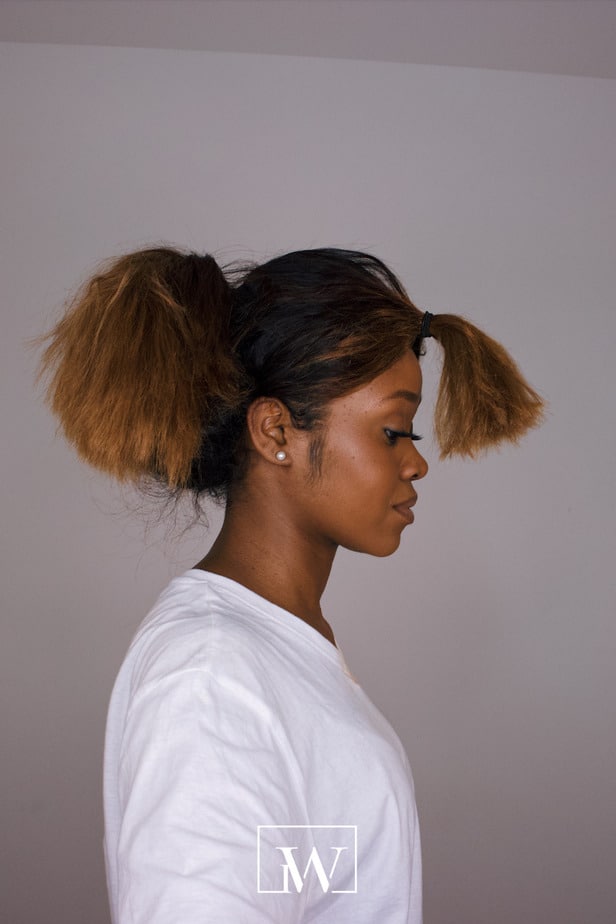
- I parted the hair in two sections from one ear to the other.
- Then I placed the two sections in two high ponytails
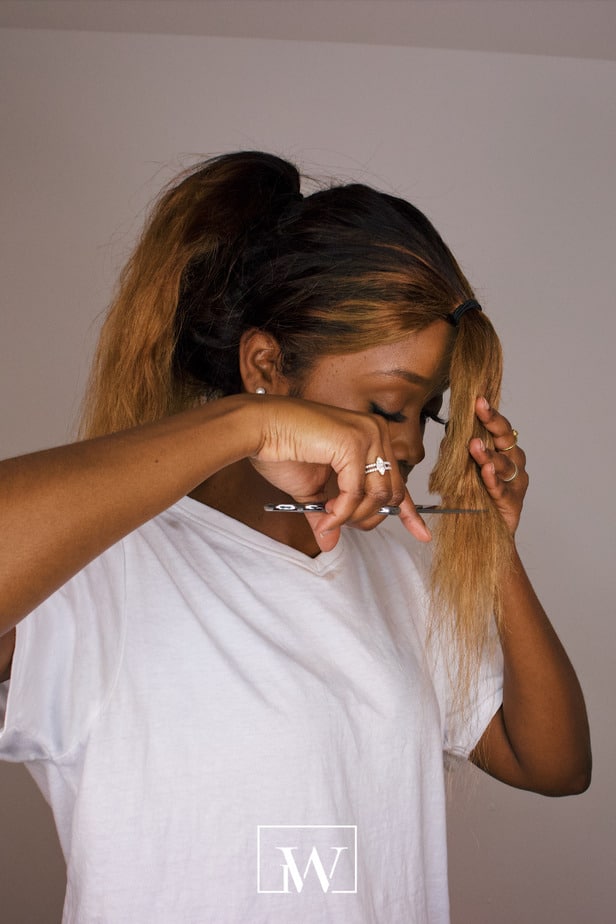
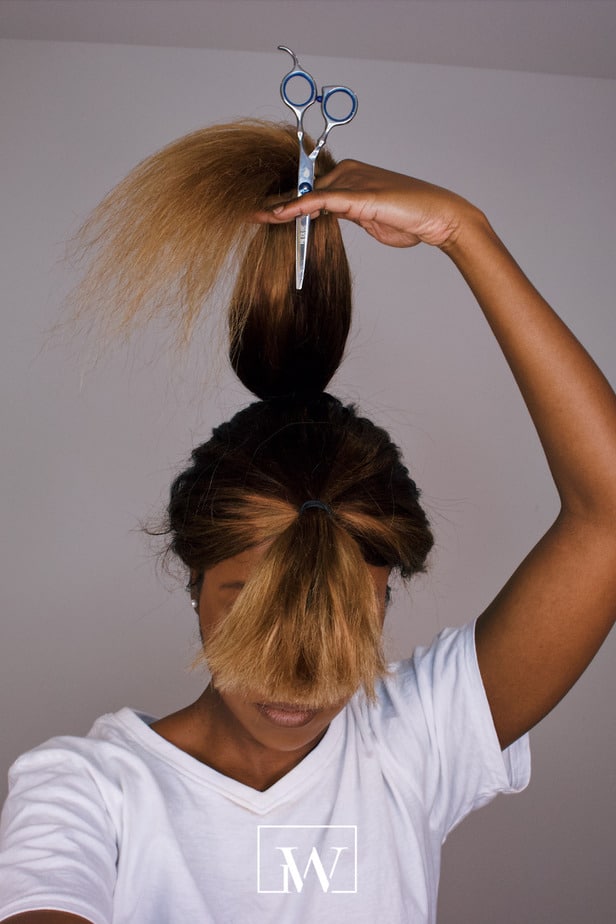
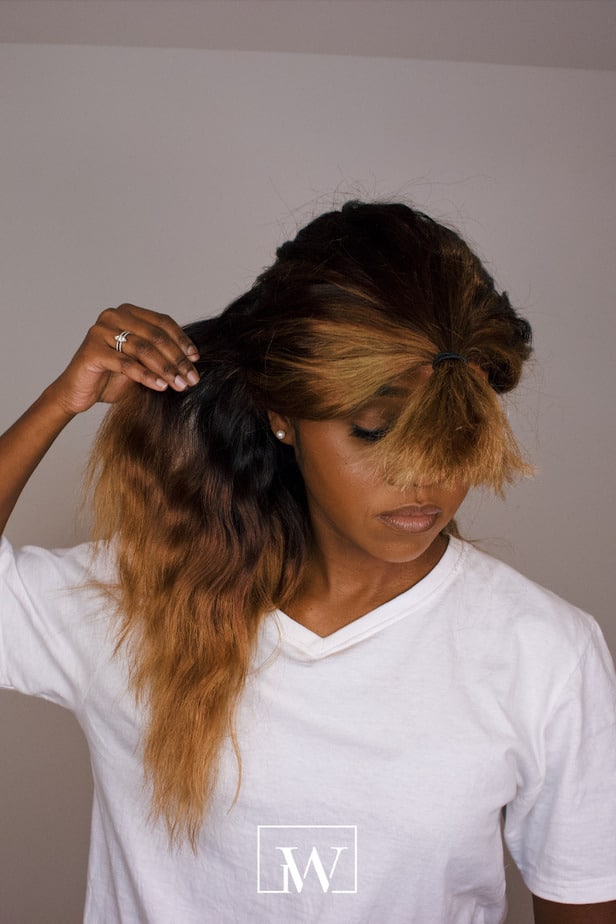
- I started to cut the front section two to three inches away from my face with special hair scissors.
- Point cut into the blunt part. This will make the layers look less sharp. The layers in the hair will appair more faded when the hair gets out of the ponytail.
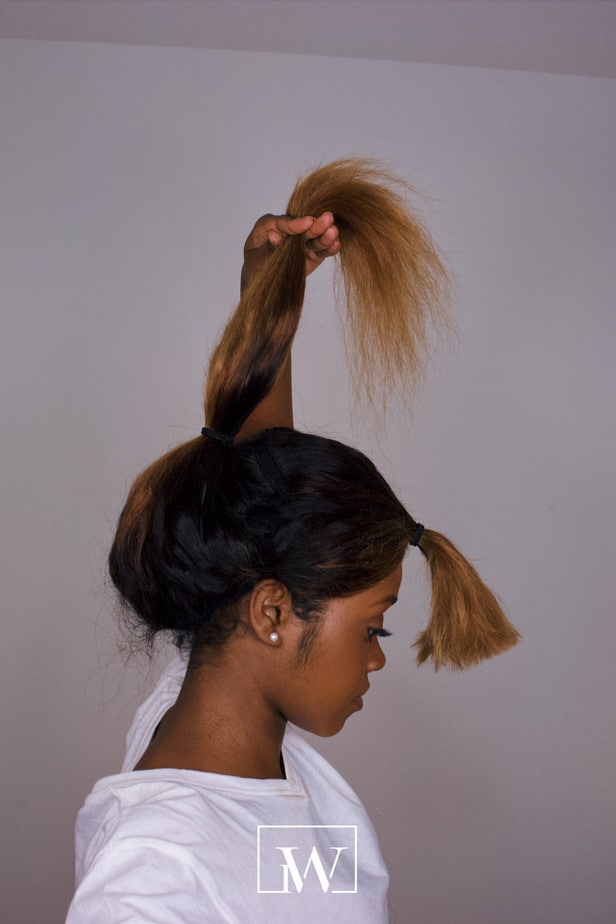
- Cut the second ponytail a little longer than the front ponytail. Point cut into the blunt hair to get rid of the sharp cut.
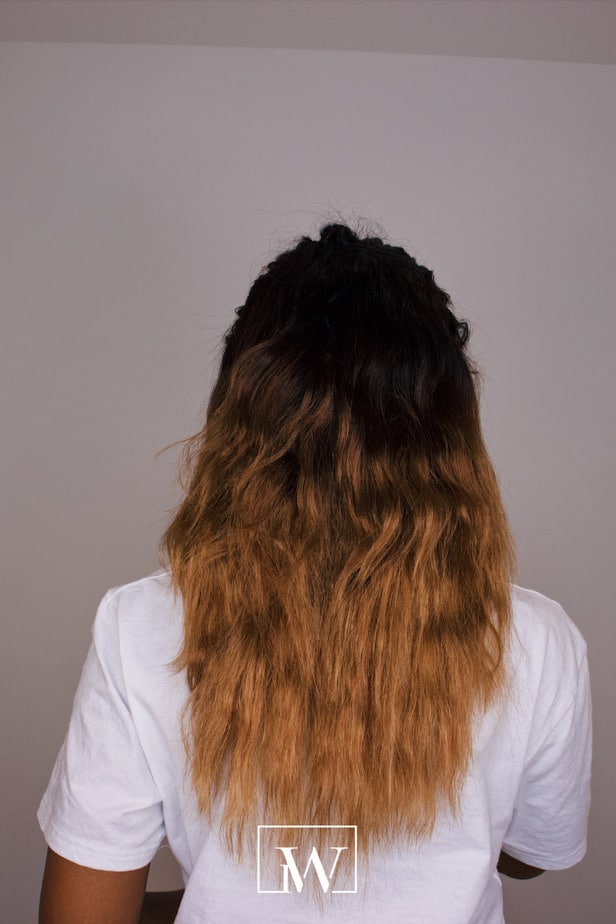
- Remove the hair out of the ponytails and style as desired.
Watch these steps imaged below
Styling the wolf cut
The products I’ve used to style my hair are:
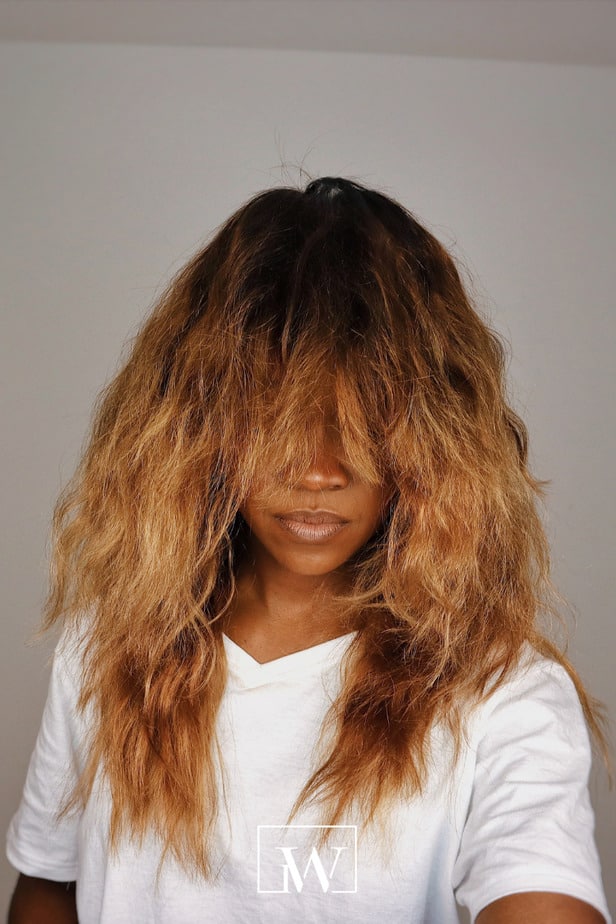
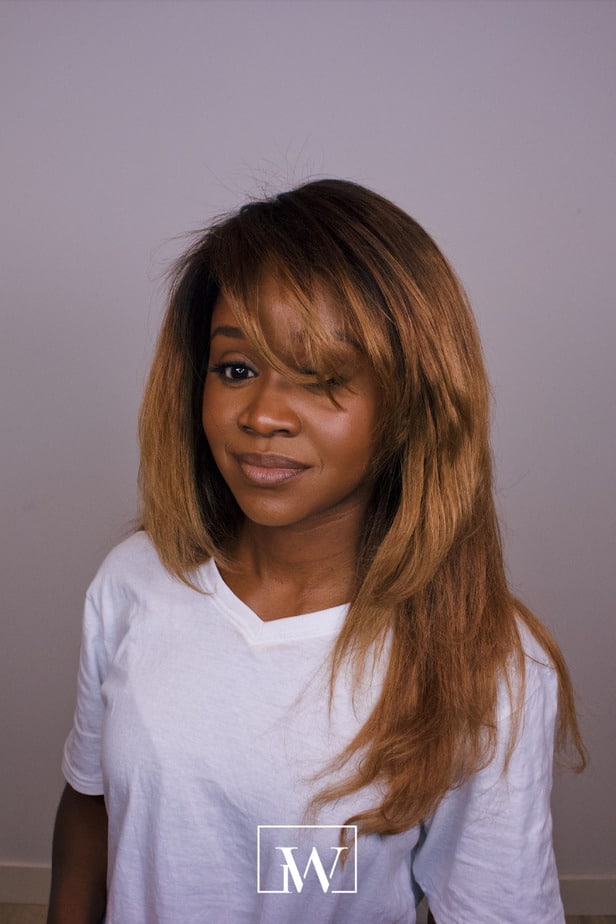
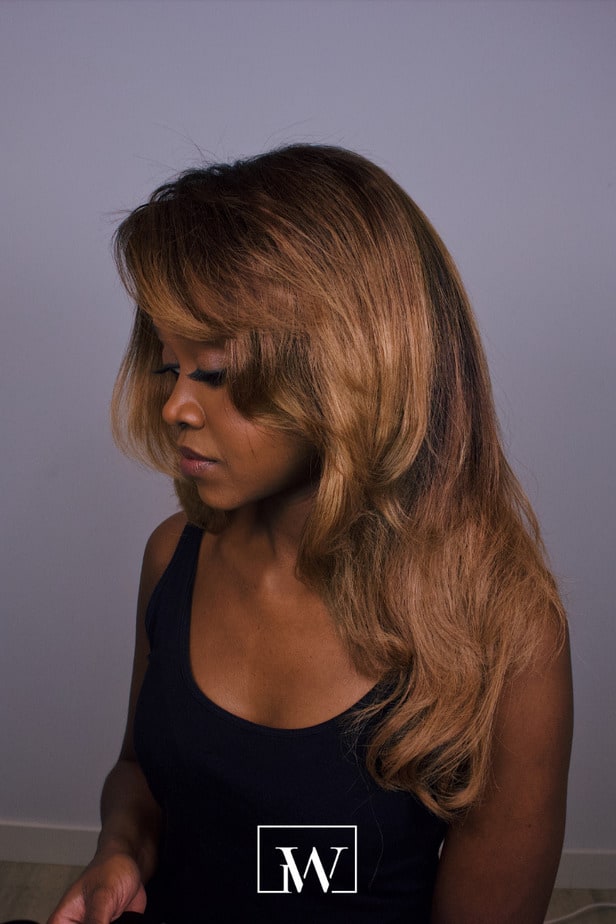
I’ve styled the wolf cut three ways; straight, curled, and slightly wavy. Check the results below.
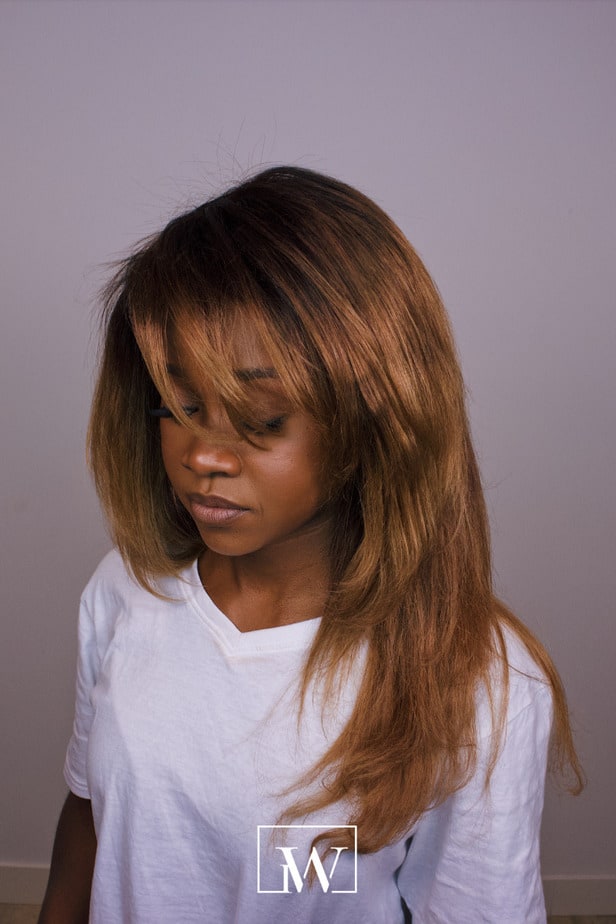
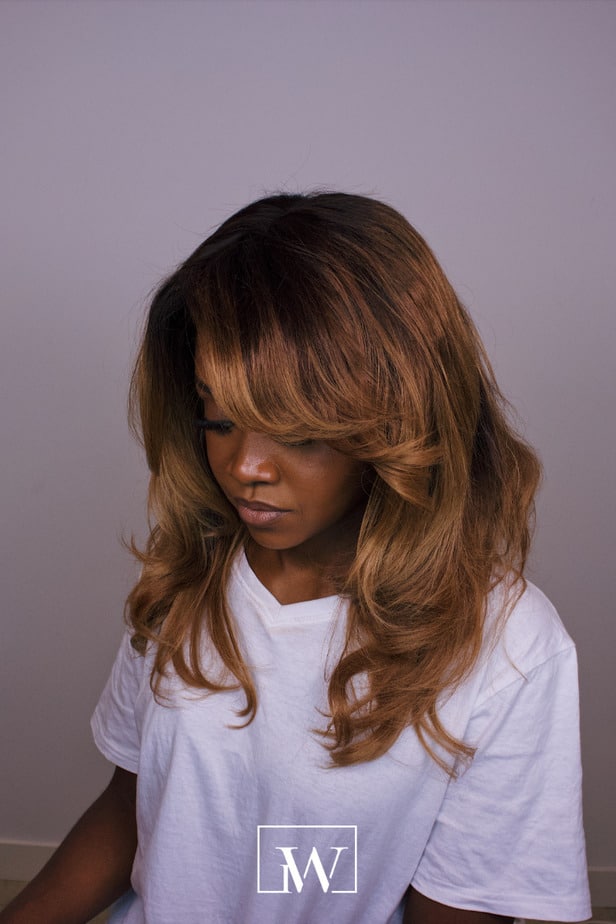
The wolf cut styled straight

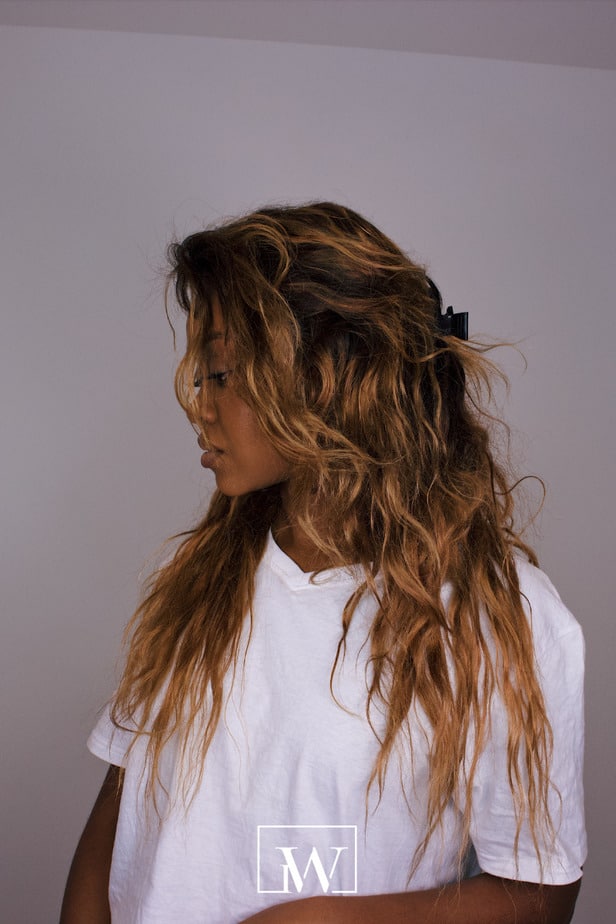
Wolf cut styled wavey

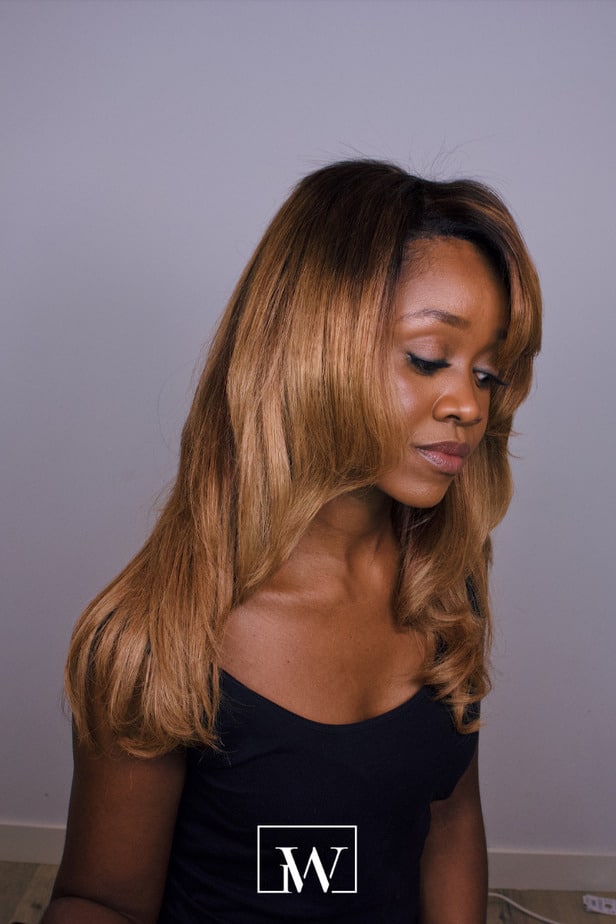
Wolf cut curled

Watch the video below:
DIY Wolf Cut | Easy Wolf Cut on a Wig I followed the Paul Watts Method
You might like to watch these videos too! These video are related to the curtain bang hairstyle that was tranding earlier this year.
DIY Curtain Bangs on a Wig
How to Salon Blowout using Revlon Kit Dupe
I hope this post inspired you to try the DIY wolf cut at home. Remember to bookmark or save this page to get easy access at any time. Thanks for stopping by. xx, Cher

DISCLAIMER:
This blog post may contain some affiliate links, from which I get a small commission when you decide to make a purchase. This does not affect you as a consumer but it does help me to create more content for you! The items included in this content have been purchased by me, all opinions are my own. Your support in any form is much appreciated. Thank you.

Thanks!